How to set up a free email system for your domain
21 Aug 2017This post assumes you have already registered a domain. If not, my next post will be about setting up a custom domain for use with GitHub Pages. When I get that written, I will update this post to reflect that new information.
Things we’ll be using:
- Gmail
- MailGun
First off, you’re going to need a MailGun account. Also, while setting up your account, mailgun requires credit card information to send emails, so if you choose to not set that up, don’t be surprised when sending emails doesn’t work. So if you don’t have a mailgun account, go set one up.
Now with your account set up, let’s add your domain. From the mailgun dashboard, under Domains select Add New Domain. Type in your domain name e.g electr0sheep.com. Now, your domain should appear in a list on the mailgun dashboard, so click it.
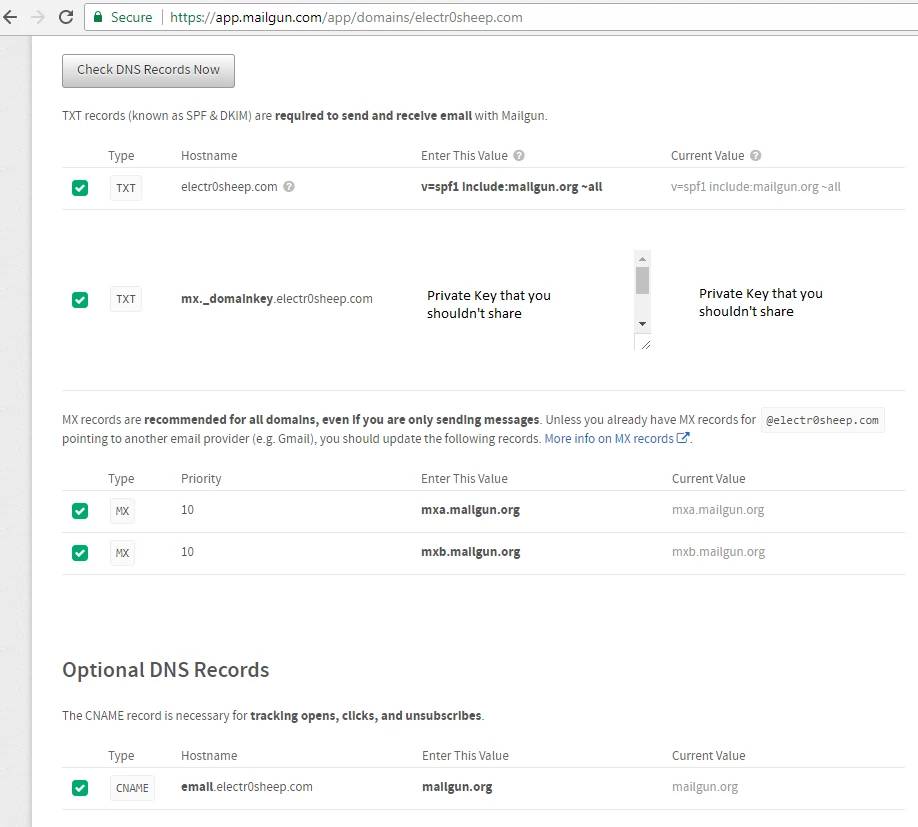
At the bottom of this next page, you should see a section called Domain Verification & DNS. In that section, you’ll see 5 DNS records you will need to add to your domain. So, go to your domain configuration page. As an example, I use Cloudflare (which you should use too), but I registered my domain through Google Domains. More on that in the next post.
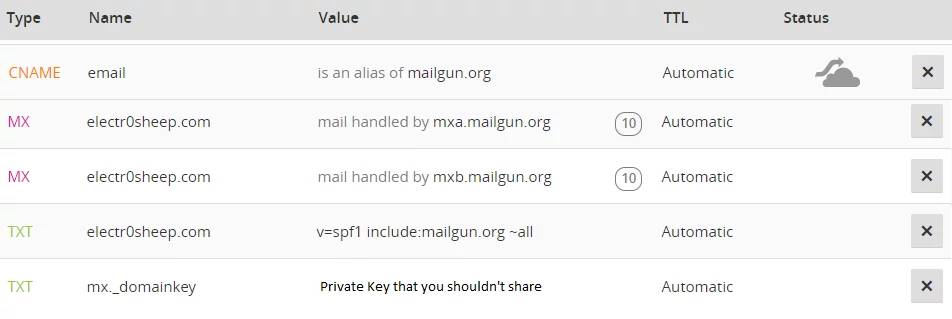
Anyway, now that your on your domain configuration page, you need to add the 5 DNS records we ran into in the previous paragraph. Let’s assume you’re using Cloudflare. I’ll show you exactly how to do this.
Here is what you should see on mailgun:

Here is what Cloudflare should look like once you have it set up:

Your mx._domainkey.domain.com TXT record is a private key that you shouldn’t go posting all over the internet, unless you want people to start sending emails as yourself.
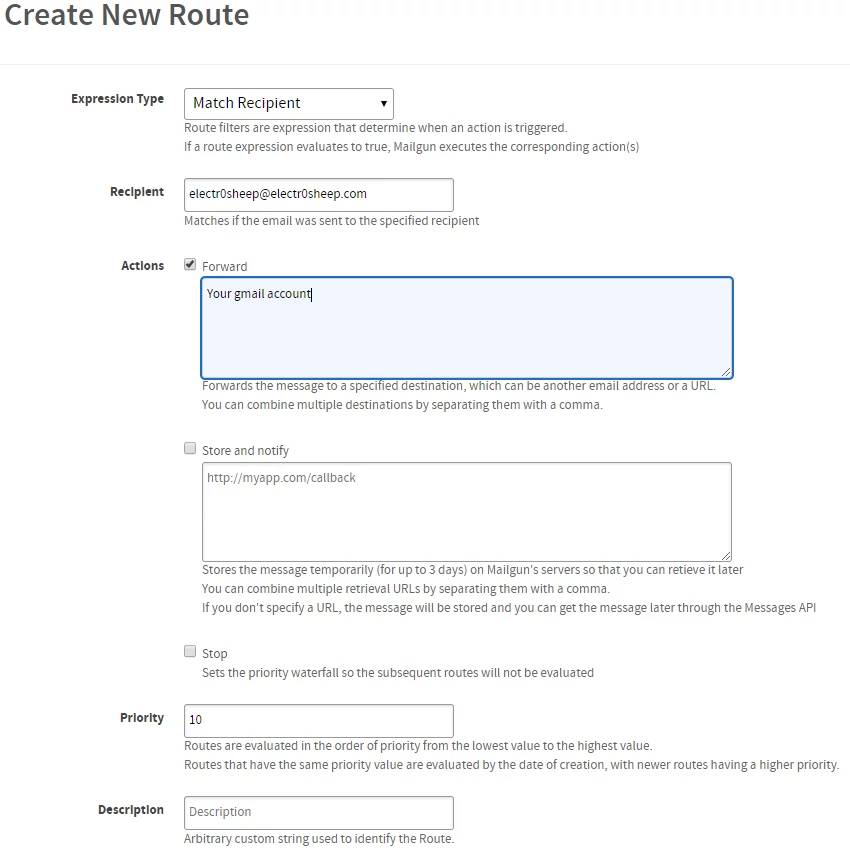
Okay, now we need to forward emails you receive from your custom domain account to your gmail account. To do this, go back to your mailgun dashboard. Select Routes and then hit Create Route.
You’ll want to do some tweaking, but here is an example of how you should fill this out:

With that done, you should now have any emails directed to your domain email sent to your primary gmail account. Now, we need to make it so you can send emails from this account as well. We’re going to need some more information from mailgun, so go back to the mailgun dashboard, click Domains and select your domain from the list. You’re going to need the information from the Domain Information field.
The information located under Domain Information is private, so again, don’t go posting this online.
With that information in mind, go to your gmail account. Click the gear at the top right, then hit Settings. Go to Accounts and Import and then click Add another email address.
In the new window that pops up, you can put whatever you want in Name:. For
the email address, enter your domain email. After you hit next, for SMTP Server:
enter smtp.mailgun.org. For Username: enter the Default SMTP Login you found
earlier in the Domain Information field from mailgun. For Password: enter
the Default Password which again was under Domain Information from mailgun.
Make sure you leave Secured connection using TLS selected, then hit Save Changes.
With all that done, you should be able to now send emails as your domain email!

